Last updated November 18, 2026






Free written scope consultation - allowances, timeline, and change-order rules on paper before a single trade is scheduled
Bathroom Remodeling Troubleshooting: Common Problems and How to Fix Them
If your newly remodeled bathroom has grout cracking, musty odor, or tile popping within the first year, the problem almost certainly isn’t the tile, the grout, or the caulk – it’s what’s behind them. We’ve walked into Hialeah bathrooms less than eighteen months past a full renovation where the floor felt spongy underfoot, the baseboard had swollen, and the owner had already paid twice to have the grout “redone.” The grout was never the problem. This guide traces the most common post-remodel failures back to the rough-in decisions that caused them, shows you how to diagnose a slow drain or a ceiling stain, and lays out exactly when to fix something yourself, when to call a licensed trade, and when the original contractor is on the hook.
Quick Answer
Most bathroom remodel problems that appear within the first year – cracking grout, persistent mildew smell, efflorescence, slow drains, water stains below the floor – trace back to three rough-in failures: a subfloor or wall substrate that flexes, missing or inadequate waterproofing membrane, and a missing vapor barrier behind tile. Surface fixes like re-grouting or re-caulking hide these for a few months but never solve them. Diagnosing which of the three you’re dealing with determines whether you can fix it yourself, need a licensed plumber or electrician, or have a workmanship defect the original contractor is legally obligated to correct.
Styles & brands we work with
- Kitchen remodeling
- Bathroom remodeling
- Home additions & ADU
- Roofing
- Windows & doors
- Driveway & pavers
- Fence
Table of Contents
- Why Is My New Grout Cracking?
- Why Does My Remodeled Bathroom Still Smell Musty?
- What Is the White Powder on My Tile and Why Does It Keep Coming Back?
- Why Is My Drain Running Slow After a Remodel?
- What Does a Water Stain on the Ceiling Below My Bathroom Mean?
- Why Do My New Bathroom Fixtures Keep Tripping the Breaker?
- Can You Fix It Yourself, or Do You Need a Licensed Trade?
- What Counts as a Workmanship Defect the Contractor Must Fix?
Why Is My New Grout Cracking?
Grout cracks because the surface underneath it is moving. Grout is a rigid, cement-based material with almost no flexibility. When the tile beneath it shifts by even a fraction of an inch – because the subfloor was undersized, the joist spacing was too wide, or the tile was set on a wood subfloor without a proper cement backer board – the grout has nowhere to go, so it splits. This is substrate flex, and it’s the most common post-remodel failure we see in Hialeah. It shows up most often along the perimeter of the room, at the transition to a shower curb, and in a straight line following the joists below.
To diagnose it, press down firmly on the tile on either side of a crack. If you feel any give, or hear a hollow sound when you tap the tile with a coin, the tile has separated from the substrate and the problem is structural. If the tiles are rock solid and the crack is hairline and isolated to one area, you may be looking at normal shrinkage that a flexible sealant in the corners can absorb.
Fixing surface flex is not a grout problem. Re-grouting a flexing floor buys you three to six months at best. The permanent fix requires either stiffening the joists below or – more commonly in Florida slab-on-grade homes – removing the tile, adding a proper cement backer board bonded with thinset, and re-tiling. In older Hialeah homes built on pier and beam or with 2×8 joists at 16 inches on center, we’ve seen bathrooms where a simple added plywood layer under the backer board would have prevented the entire failure.
- Crack along the room perimeter: usually tile shrinkage or missing movement joint – often fixable with flexible sealant.
- Straight-line crack following a joist: substrate deflection – needs structural correction.
- Hollow-sounding tile with cracked grout: tile has debonded – tile must be removed and reset.
- Crack radiating from a corner of the shower pan: pan movement or missing pre-slope – waterproofing issue, not grout.
Why Does My Remodeled Bathroom Still Smell Musty?
A musty smell in a bathroom that was just remodeled means moisture is trapped where it shouldn’t be. The two most likely culprits are an inadequate waterproofing membrane behind the shower tile and a shower pan that wasn’t built with the correct slope to drain. Either one leaves standing water in the wall cavity or under the tile bed, and mold begins to grow within weeks. In Hialeah’s year-round humidity – where outdoor relative humidity sits above 70% for most of the year – that trapped moisture has no way to dry out, so the smell gets worse, not better, over time.
Here’s the diagnostic path we use:
- Seal the room and let it stand. Close the door and run the exhaust fan for 20 minutes, then shut it off and wait an hour. If the smell returns with the fan off, the source is inside the bathroom envelope.
- Smell the shower drain and the toilet base separately. A sewer-gas smell from the drain points to a dried-out P-trap or a venting problem, not mold.
- Look at the caulk line at the base of the shower walls and along the curb. Discolored, soft, or mold-spotted caulk at those joints often signals water getting behind the tile from the shower enclosure.
- Check the exterior wall below the bathroom on the first floor. A musty basement smell or efflorescence there tells you moisture is migrating through the wall from the bathroom above.
- Remove the shower valve trim plate (if you’re comfortable doing it) and look at the back of the wall cavity with a flashlight. Black discoloration on the substrate is a confirmed membrane failure.
If the membrane is the culprit, the only permanent fix is to remove the tile on the affected wall, install a proper waterproofing membrane (a liquid-applied or sheet membrane meeting ANSI A118.10), and re-tile. Hialeah’s building department enforces the Florida Building Code requirement for a waterproof membrane in wet areas, so if the original job skipped that step, that’s a code failure, not a cosmetic one.
What Is the White Powder on My Tile and Why Does It Keep Coming Back?
Efflorescence is a white, powdery mineral deposit that appears on grout lines, tile, and the base of bathroom walls when water moves through the substrate and evaporates on the surface, leaving salt behind. It’s not a stain you can scrub off permanently – it’s a symptom. The water that carried the salts out has to come from somewhere, and in a newly remodeled bathroom it usually means the vapor barrier behind the wall tile or the moisture barrier under the floor is missing or breached.
In Hialeah homes built between the 1960s and 1990s, we regularly see efflorescence along the base of exterior bathroom walls where the exterior stucco meets the interior tile. Older stucco finishes aren’t vapor-permeable enough to let the wall cavity breathe, and when a remodel installs tile directly over that old surface without a proper vapor barrier, moisture from the exterior wall wicks inward. The salt deposits show up within four to eight months.
Testing it is simple: mix a few drops of white vinegar with water and dab it on the white powder. If it fizzes, it’s efflorescence (a mineral). If it doesn’t, it’s more likely soap scum or mold. A real efflorescence problem returns within weeks of cleaning no matter how aggressively you scrub, which is the defining tell.
- Permanent fix: remove the affected tile, install a vapor barrier on the wall assembly, re-waterproof, and re-tile.
- Temporary fix: a penetrating sealer on grout buys a few months but does not stop recurrence.
- Do not: use acid-based tile cleaners. They etch grout and accelerate the breakdown.
Why Is My Drain Running Slow After a Remodel?
A drain that runs slow after a remodel has one of three causes: debris in the P-trap from the construction work, a plumbing vent that was capped or connected wrong during the rough-in, or a drain rough-in slope that was installed too shallow or back-pitched. All three produce a slow drain, but only one is a workmanship defect and the fix for each is entirely different.
Start with the simplest test. Fill the bathroom sink and let it drain. If the sink drains fast but the shower or tub drains slow, the problem is local to that fixture’s trap. If everything in the bathroom runs slow – sink, tub, and toilet flush weak – the problem is in the shared waste line or the vent.
P-trap debris is the most common cause on a newly finished bathroom. Thinset dust, grout, and drywall mud wash down during cleanup and settle in the trap. A licensed plumber can usually clear it with a snake in twenty minutes. If the trap is new PEX or PVC and hasn’t been touched since install, this is almost always the answer.
A venting problem shows up as gurgling, a slow drain that improves when you run water in another fixture, or sewer gas smell. During a remodel, a plumber sometimes caps an existing vent and forgets to reconnect it, or re-routes a vent line with the wrong fitting. This is a real defect and requires plumbing to correct.
A slope error is the worst case. Drain lines need roughly a quarter inch of fall per linear foot of run. If the plumber installed the new line too flat, or back-pitched it to make the trap fit, water pools in the pipe and solids settle. Signs of a slope error: slow draining that got worse over months rather than staying constant, repeated clogs even after snaking, and a drain that drains better when the house has been sitting empty for a few days. A slope error almost always means opening the ceiling below or the floor – but it’s the original contractor’s obligation to correct it, and it does not go away on its own.
What Does a Water Stain on the Ceiling Below My Bathroom Mean?
A water stain on the ceiling directly below a bathroom means water is escaping from the bathroom floor assembly, the shower pan, the drain connection, or a supply line – and where the stain appears tells you which one to check first. About 40% of the time the stain sits directly below the shower. About 35% it sits below the toilet or the vanity. The remaining 25% of stains appear near the bathroom’s outer walls where the supply lines run.
The good news is you can usually trace it without tearing out the entire floor above. Here’s the sequence:
- Dry everything and mark the stain boundary with a pencil line. Wait 24 hours. If the stain grows, the leak is active. If it stops, you may be looking at an old stain from construction that was never repaired.
- Test the shower pan separately. Run the shower only (not the sink or toilet) for 15 minutes. If the stain darkens or grows, the shower pan or the drain connection under the shower is the source.
- Test the toilet separately. Flush repeatedly for two minutes. If the stain reappears, the wax ring or the toilet flange is the source, and a failed wax ring after a remodel is extremely common.
- Test the sink and vanity plumbing. Run the sink for a few minutes and look for moisture at the drain tailpiece and the P-trap under the cabinet before it disappears into the floor.
- Test the supply lines. Turn off all fixtures and watch the water meter for 15 minutes. If the meter moves, you have a supply-side leak you can’t see, and a plumber needs to isolate it.
If the shower pan is the source, the correct repair usually involves removing the tile on the shower floor and rebuilding the pan with a proper pre-slope and waterproof liner. Ceiling stains are the highest-priority diagnosis in this guide. A slow leak under a Hialeah bathroom will rot subfloor sheathing and grow mold inside a month in our humidity, so don’t wait to see if it dries out.
Why Do My New Bathroom Fixtures Keep Tripping the Breaker?
New bathroom fixtures trip a breaker because the circuit they were added to wasn’t sized for the load. Traditional Hialeah homes were often wired with a single 15-amp circuit serving the bathroom outlet, the vanity light, and the exhaust fan. Add a heated towel bar, a smart mirror, an LED vanity with a driver, an under-cabinet strip, and a jetted tub pump, and that circuit hits its limit. A GFCI tripping repeatedly after a remodel almost always means either overload or a wiring fault downstream – not a defective GFCI.
The National Electrical Code requires bathroom receptacles to be on a dedicated 20-amp circuit protected by GFCI, and it requires the exhaust fan to be a separate switched run if the fixture is rated for a separate circuit. In many older Hialeah homes, the fan was wired to the vanity light switch, so every time the light came on the fan came on too – that’s acceptable if the fan can run continuously, but it’s not acceptable if the fan was upgraded to a higher CFM unit that draws more current than the old wiring can safely support.
Signs that the old wiring was not designed for the new load:
- Breaker trips only when the fan and the heated towel bar run at the same time.
- Lights dim briefly when the fan motor starts.
- The GFCI trips when you plug in a hair dryer but not when you plug in a phone charger.
- Bathroom switches feel warm to the touch after the fan has been running for 15 minutes.
- The fan hums louder than it did on day one, or makes a grinding sound.
Do not fix this by installing a larger breaker. A larger breaker doesn’t create more capacity in the wiring; it creates a fire hazard. The correct fix is a licensed electrician running a dedicated circuit, usually a 20-amp GFCI circuit for the receptacles and a separate switched run for the fan. In Hialeah, the city requires an electrical permit for this scope, and any legitimately licensed electrician will pull one. If your original remodel contractor added fixtures without pulling a permit for the electrical work, that’s a defect – and it’s the reason the wiring is where you are today.
Can You Fix It Yourself, or Do You Need a Licensed Trade?
Some bathroom remodel problems are homeowner-fixable, some require a licensed trade, and some are workmanship defects that the original contractor has to correct at their cost. Getting the line right saves you from doing expensive work yourself that someone else owes you, or from paying a trade for a five-minute fix.
Fix-it-yourself items
- Re-caulking a joint where flexible sealant has failed (tub surround, vanity backsplash, shower enclosure frame).
- Replacing a toilet flapper or fill valve that’s running constantly after install.
- Cleaning a debris-clogged aerator or showerhead screen.
- Replacing a bath fan motor that’s making noise (if the model has a replaceable motor, which most do).
- Resetting a tripped GFCI outlet – but only once. If it trips again, call a licensed electrician.
Call a licensed trade
- Slow drains that don’t clear with a hand snake (plumber).
- A water stain on the ceiling that grows (plumber, and possibly a restoration contractor if the moisture has reached the framing).
- Any electrical work – new circuit, fan replacement, GFCI fault (licensed electrician).
- Shower pan leaks (licensed tile contractor with waterproofing credentials).
- Grout cracking that follows a joist (licensed carpenter or structural contractor before any cosmetic repair).
Workmanship defect – contractor must fix
- Any failure where the rough-in did not meet code: no waterproof membrane, no vapor barrier on an exterior wall, no pre-slope in a shower pan, no permit pulled.
- Drain slope errors that cause repeated clogs.
- Floor flex due to undersized subfloor installed below the manufacturer’s minimum.
- Electrical additions that overloaded a circuit that should have been upgraded.
Do not do-it-yourself structural corrections, shower pan rebuilds, or drain slope repairs. Those failures originate in decisions only the contractor should have made during rough-in, and correcting them is their responsibility – not something you spend your own time and money to solve.
What Counts as a Workmanship Defect the Contractor Must Fix?
A workmanship defect is any deviation from the building code, the manufacturer’s installation instructions, or the written scope of work in your contract that causes or is likely to cause a failure. In Florida, you have more protection than most homeowners realize. Florida Statute Chapter 713 governs construction liens and gives you the right to demand correction of a defect before a contractor can place a lien on your property for the disputed amount. Florida also recognizes an implied warranty of workmanlike construction in residential contracts – meaning any licensed contractor implicitly warrants that their work will be done in a workmanlike manner, regardless of what the contract says.
To make a defect claim stick, you need three things:
- Documentation. Photos with dates, the original contract, the permit number, and a written description of the failure. A text message saying “the tile is cracking” doesn’t survive a contractor’s denial. A dated photo with a description does.
- Confirmation the work was defective, not just worn or neglected. A licensed inspector or a licensed trade who inspects the failure and writes up their findings in a letter is the standard evidence.
- A written demand before you hire someone else. Florida contracts and the state licensing board generally require you to give the original contractor a reasonable opportunity to correct the defect before you can recover the cost of the repair. Send the demand in writing, with a reasonable deadline. Save the response – or the silence.
The most common defect claims we see in Hialeah involve missing waterproofing, shower pans installed without a pre-slope, and electrical work done without a permit. All three are code violations, which makes the claim straightforward. If your contractor did work without pulling a permit, that’s the single fastest way to confirm a workmanship defect – you can look up the permit history for your address at the Hialeah building department, and if there is no permit for the rough-in work, your contractor has a legal problem that’s much bigger than your tile.
For homeowners who inherit a bathroom remodel from a contractor who’s no longer responsive or no longer in business, we regularly take on the corrective work. In those cases, the honest answer is that the fix is more expensive than the original job should have been, which is why we push for permits, written scope, and a long workmanship warranty on every job we do. Our 730-Day Done Right Promise exists because twice in our careers we’ve walked into a Hialeah bathroom after another contractor and seen what a rough-in failure costs the homeowner. Two years of coverage is the minimum we believe a real workmanship guarantee should offer.
Common Mistakes to Avoid
- Re-grouting a flexing floor instead of fixing the substrate. Grout is a symptom, not a disease. New grout on a moving floor fails again within months, and every repair cycle costs more than the substrate correction would have.
- Skipping the permit for rough-in work. In Hialeah, plumbing and electrical rough-in require a permit and inspection. Skipping it means the work isn’t verified by a code inspector, the workmanship warranty may be void, and you can’t easily sell the home without a correction order.
- Testing a slow drain by renting a bigger auger. If the drain is slow because of a vent or a slope problem, an auger makes no difference. Diagnose the problem before you pay for a plumber’s time on the wrong fix.
- Using acid-based cleaners on efflorescence. They eat grout and accelerate the very failure you’re trying to stop. Vinegar and water for the test, gentle cleaners for cleanup, and a professional for the actual cause.
- Adding bathroom fixtures without checking the circuit. A 15-amp circuit serving a vanity light and one outlet won’t handle a heated towel bar and a jetted tub pump. Adding load to an undersized circuit is the single most common electrical defect we see in Hialeah remodels.
- Assuming a shower pan leak will “dry out.” In Hialeah’s humidity, it won’t. Trapped moisture grows mold, rots subfloor, and spreads within weeks.
- Hiring a trade to fix a defect before sending a written demand to the original contractor. Voluntary repair costs come out of your pocket and can weaken your legal position. Identify the defect in writing first.
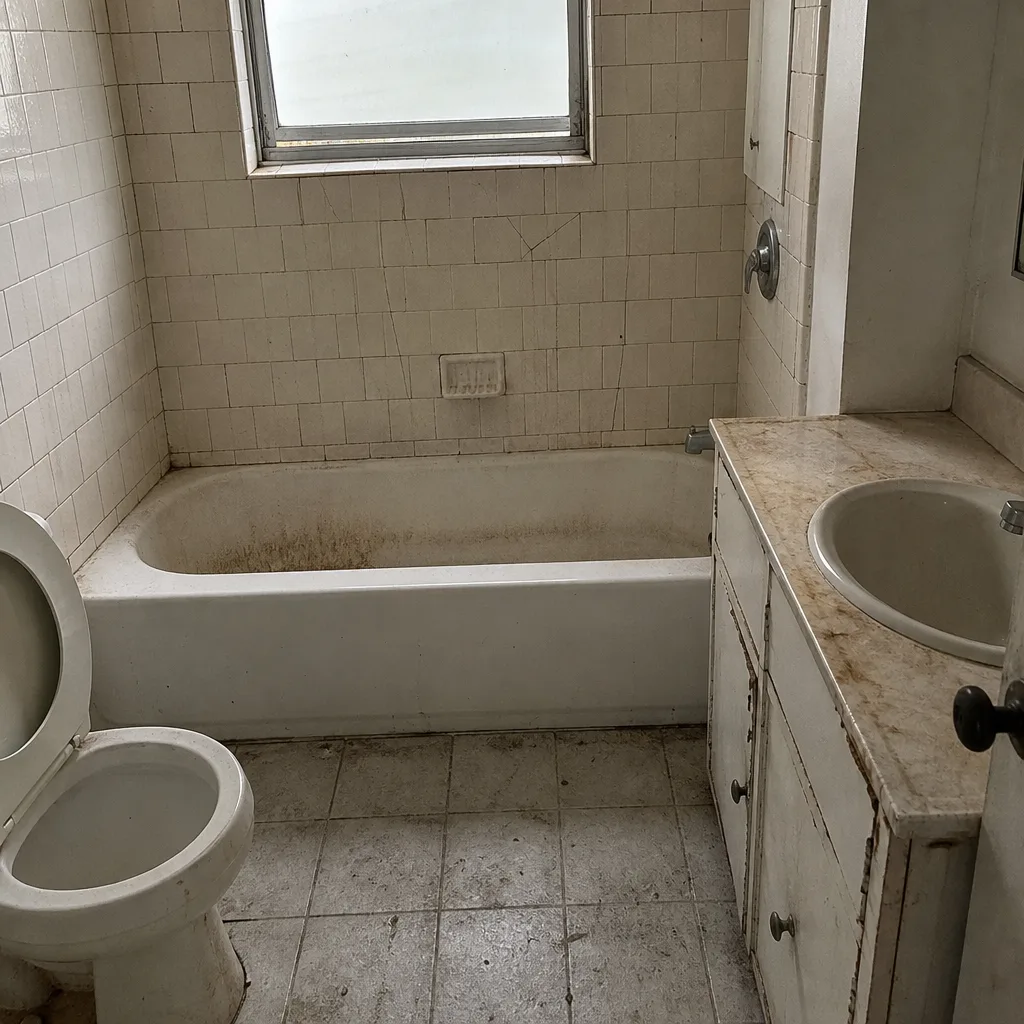
See the difference
 Before
 After
 Before
 After
 Before
 After
When to Call a Professional
Call a professional when the symptom is structural, when the fix would require opening a wall or floor, or when you’re not certain whether the failure is a workmanship defect. A professional inspection – even if you end up handling a small fix yourself – confirms what you’re actually dealing with and preserves the documentation you’ll need if the original contractor is on the hook. Get a second opinion when the fix costs more than a few hundred dollars, when the contractor who did the original work is unreachable, or when more than one trade is involved. For electrical work, plumbing rough-in, and shower pan corrections, insist on a licensed trade who will pull a permit. For drywall, tile, and cosmetic corrections after the rough-in is corrected, a general contractor can coordinate it.
Groundwork Construction Co. of Hialeah offers free estimates in Hialeah – call (888) 418-7102. We inspect the failure, confirm what’s cosmetic versus what’s structural, and give you a written line-item quote before any work starts. Calls are answered by a live person 24 hours a day, so you can reach us in the evening when the crack in the grout finally has your attention.
Frequently Asked Questions
Sometimes the answer is yes. If the crack is a hairline along the wall perimeter or the transition between the floor and the tub, a flexible sealant in those joints is the right homeowner fix and takes an afternoon. If the crack follows a line above a joist, if the tiles around it feel hollow or give when you press on them, or if the crack has returned twice after re-grouting, the problem is substrate flex and re-grouting is a wasted effort. Call (888) 418-7102 for a free estimate – we can usually look at a photo and tell you which category you’re in within minutes.
A short-lived smell during the first two weeks after a remodel can be normal construction odor – thinset, grout, and caulk release moisture as they cure. A musty smell that persists past four weeks, or that gets stronger when the bathroom is warm and closed up, is a sign that moisture is trapped in the assembly. The most common causes are an inadequate waterproofing membrane in the shower, a shower pan without a pre-slope, or an exhaust fan that doesn’t vent outside (vented into the attic instead of through the roof). Call (888) 418-7102 for a free estimate – identifying the source correctly on the first visit saves you from paying for a fix that doesn’t solve the problem.
Almost never. The diagnostic sequence above (test shower, test toilet, test sink, test supply) identifies the source about 90% of the time without opening anything. Once the source is identified, the repair is targeted: a wax ring, a shower pan rebuilld, a drain connection, or a supply line – not a full floor replacement. What you should not do is wait to see if the stain dries. In Hialeah’s climate, a slow leak under a bathroom can rot subfloor sheathing within a month and spread mold into the walls within two. Call (888) 418-7102 for a free estimate – we can usually tell you which fixture is responsible based on where the stain is on the ceiling.
The most common cause is that the fan was added to a circuit that wasn’t sized for the additional current, especially in Hialeah homes where the bathroom outlet, vanity light, and fan were originally on a single 15-amp circuit. The second most common cause is a defective fan motor. The third is a wiring fault at the junction box, which is a safety issue and needs immediate attention. Do not install a larger breaker as a fix – the correct fix is a dedicated circuit, pulled by a licensed electrician with a permit. Call (888) 418-7102 for a free estimate on the electrical correction.
Often, yes. Efflorescence coming back repeatedly means moisture is moving through the wall assembly, which usually means the vapor barrier was omitted or breached during rough-in – a step that’s required by the Florida Building Code for exterior walls. If the work was permitted and inspected, the inspector may have missed it, but the omission is still on the contractor who installed the tile. In Hialeah, we see this most often in homes built between the 1960s and 1990s, where the existing exterior wall finish needed a vapor barrier added during the remodel. Call (888) 418-7102 for a free estimate – we can inspect the wall and tell you whether it’s a defect or just a surface issue within an hour.
A shower pan rebuild (the most common rough-in correction) takes three to five working days, including permit if required. A drain slope correction is usually two to four days because it involves opening and closing the ceiling or floor. A waterproofing membrane correction on a tile wall is three to four days. A subfloor stiffening and re-tile of a bathroom floor is usually five to seven days. Electrical corrections are typically one to two days if no new circuits are needed. Your project scope drives the schedule, so we don’t quote a timeline before we’ve inspected the failure. Call (888) 418-7102 for a free estimate and we’ll put a real schedule in front of you before you commit.
When you’re ready to look further than a single bathroom, our team handles the full range of Hialeah home projects – see our Groundwork Construction Co. of Hialeah home page, our Driveway & Pavers in Hialeah service, our Fence Installation in Hialeah service, and our Home Additions & ADU in Hialeah capabilities when the bathroom correction uncovers something bigger in the walls or slab.
The Bottom Line
Grout cracks, musty odors, efflorescence, slow drains, ceiling stains, and tripping breakers in a newly remodeled Hialeah bathroom almost never have a surface cause. They trace back to three decisions made during rough-in: a substrate that flexes, a waterproofing membrane that’s missing or incomplete, and a vapor barrier that was never installed. Knowing which failure pattern you’re looking at lets you demand the right fix from the right party – whether that’s a homeowner-fixable caulk joint, a licensed trade, or the original contractor’s obligation under Florida law. Permits, written scope, and a long workmanship warranty are the three things that protect you before the first tile goes down. That’s why every project we handle is covered by our 730-Day Done Right Promise, backed by brand partners like CertainTeed and Owens Corning for the materials that go behind the walls.
If your bathroom has a failure you’re not sure about, call Groundwork Construction Co. of Hialeah at (888) 418-7102 for a free estimate. We’ll inspect the failure, tell you exactly what’s behind it, and give you a written line-item quote – the number you see is the number you pay. Live person, 24/7. No-hassle upfront pricing. $1,000 off projects over $10,000, plus 0% financing for 18 months so a rough-in correction doesn’t have to wait for a better month.
Written by the team at Groundwork Construction Co. of Hialeah.